Candy, fruit, Gluten Free, Petit Four, Recipes, Vegan

Coconut & Pomegranate Mochi [Vegan, Gluten Free]

Image

Mochi is a treat that I loved as a kid, and still love to this day. For those of you who haven’t experienced this Japanese delight, mochi is a slightly sweet, sticky dessert snack made from Mochiko, or glutinous rice flour.

Image

As I strolled about the market the other day, I saw a basket full of fresh pomegranates, and I knew I wanted to cook with them. I love pomegranate seeds not only for their taste, but also their look; they look like shiny, precious gemstones, and what girl doesn’t love a little sparkle?

Image

The batter before being cooked. I have been dying to make something with coconut lately, and I knew this would be a match made in heaven!

Image

Coming out of the oven. This recipe is by NO means anything close to the traditional method of making mochi, which for years has been made by pounding glutinous rice over and over again in a large mortar-and-pestle type of tool, but homie ain’t got time to play games! This recipe is infinitely easier; you literally just need a whisk and a bowl, and you’re good to go!

Image

Cutting into the sticky stuff! Make sure you use a clean, sharp knife before cutting into these babies, otherwise you’ll have to deal with the mochi sticking to your knife and a not-so-pretty mess on your hands.

Image

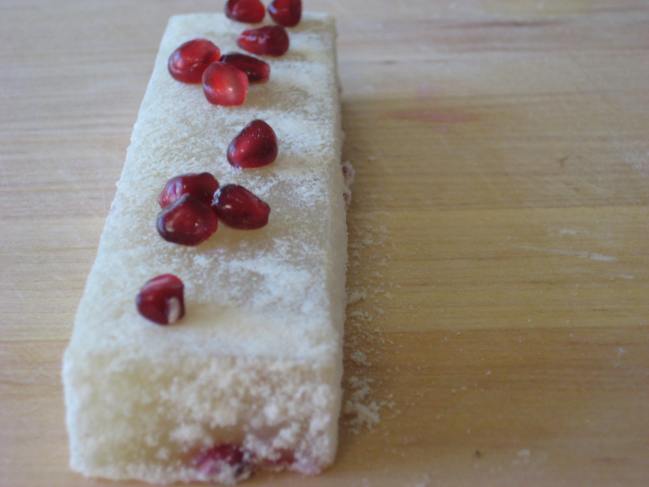
The finished product. The mochi itself is creamy, chewy, and soft, and the pomegranate seeds add a crunch and a tart pop of flavor when you bite into them. For the mochi I used a blend of both coconut water and coconut milk, to keep it from being overly rich. I also tossed the mochi in some coconut flour instead of the traditional rice flour, giving it a nice nutty flavor as well.

Coconut & Pomegranate Mochi

makes 28 (1×1″) pieces or 7 (1×4″) logs (as pictured)

311 g Mochiko (sweet rice flour)

324 g granulated white sugar

224 g coconut water

254 g coconut milk

65 g fresh pomegranate seeds, carefully patted dry

coconut flour, as needed

Preheat your oven to 350F. Liberally grease a 9×9″ square pan. In a large mixing bowl, whisk together your Mochiko and sugar until combined. Whisk in coconut water and coconut milk, stirring just until there are no more lumps. Gently fold in your pomegranate seeds, and pour batter into your prepared pan. Bake for 1 hour, or until the edges of your mochi are lightly golden brown and the mochi jiggles just slightly in the center if shaken. Cool completely. Run a knife around the edge of your pan, and turn over onto a cutting board covered with parchment (to keep it from sticking as you cut it). Using a clean, SHARP knife, trim off your edges (they’re too tough to serve) and then cut mochi into 1×1″ cubes (or 1×4″ logs like I did, but keep in mind that this is a large portion!), and then gently toss in coconut flour just to cover all sides. Garnish with more fresh pomegranate seeds if desired, and enjoy!
Standard
Cake, Caramel, Chocolate, Cookies, Custard, DIY, fruit, Petit Four, Places, Wedding

Wedded Bliss Part 4: The Cake, The Day

399906_10201060574337950_178797941_n

After over a year of planning, last Saturday Robert and I finally got married! A couple of hours ago we just got back from our amazing honeymoon (woot Vegas!) so now I finally have some time to show you guys a couple of pictures. I’m not going to post up too many pictures just because the photographers we hired need a couple more weeks before all the images are edited, but I just wanna give you guys a taste of our special day.

IMG_5428

Macaron craziness. I made roughly 400 macarons to give as our favors for our guests. Soo much effort but it was totally worth it! Each person got a raspberry lychee rose macaron, a hazelnut caramel macaron, and a dark chocolate, olive oil, and fleur de sel macaron.

IMG_5438

All packaged and ready to go! Because of the massive number that I had to make and how tiny our apartment is, I would say this was more than a challenge, but it all worked out in the end. I also had some help from the hubby with packaging them 🙂

User comments

Trying to Tetris the tiers of our cake into our fridge. The cake was literally the easiest part of the wedding planning. For a long time I already knew what I wanted to do and how I wanted it to look, and it definitely helped that I build wedding cakes at work all the time.

164641_10201060582378151_1024440684_n

The finished cake: coconut sponge cake, lemon curd filling, and Italian buttercream. We had one of Robert’s friends help us deliver the cake and stack it the morning of, so that was a good amount of weight off of our shoulders and it turned out looking just as awesome as I imagined. I love how rustic and homemade (but also clean and finished) it looks.

395642_641188255894925_800580002_n

Cutting into our cake. The gumpaste peonies held up throughout delivery and the day of, so I’m pretty proud of that as well.

404745_10200502927830170_862987853_n

Anyway, I hope you guys enjoyed my little post about our big day. The weather was amazing, the food was amazing, and the entire day couldn’t have been any better. I am now happily married to the most amazing man I’ve ever met, and looking forward to a lifetime of happiness with him. While I didn’t get a chance to post about some of the other wedding-related crafts I made (our guest book, our painting, the chair hangs, etc.) hopefully you all got a good taste of what went on during these “Wedded Bliss” posts. Love you guys, and thanks for reading! 🙂

Standard
Cake, Candy, Chocolate, Cookies, Crafts, DIY, fruit, Petit Four, Wedding

Wedded Bliss Part 3: Flowers and Showers

Image

Yesterday Robert’s mom was kind enough to throw me a bridal shower, and I have to say it was a lot of fun! We played games, won prizes, had awesome food, and I got to open up some great and very thoughtful gifts.

Image

All the bridesmaids seemed to enjoy themselves as well, so I’m pretty happy about that. The theme colors were pink and gold, and I wanted to make a little dessert buffet to match that.

Image

The spread looks kinda small, but we were only expecting 20 or so people, so it ended up being just enough desserts!

Image

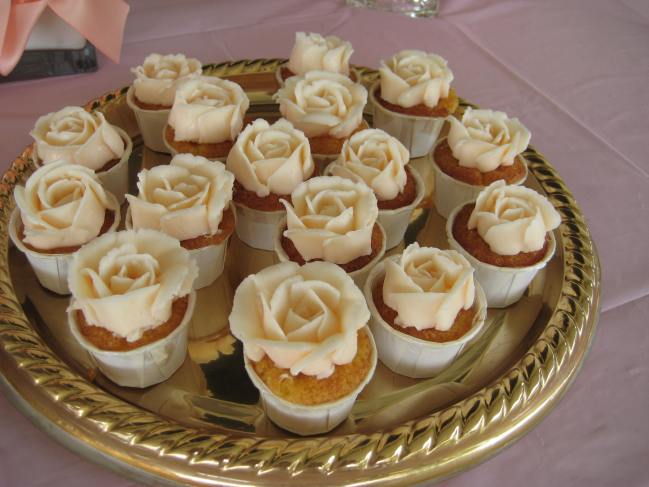
Mini almond and orange cupcakes with buttercream roses.

Image

Strawberry and rose truffles. I absolutely LOVED these babies, and they were so easy to make. Not gonna lie, I left a few of these at my house to snack on….

Image

Coconut cake pops and mango-peach marshmallow lollipops. The marshmallow lollipops turned out a little more difficult to make than I remember, but they came out really cute and pretty damn delicious so I’m proud of them!

Image

Lemon sugar cookies that say “je t’aime.” Cute and simple!

Image

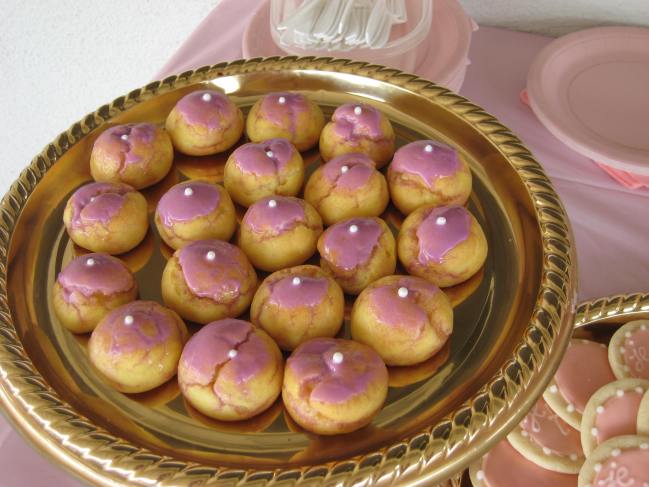
Vanilla pate a choux. Another simple flavor, but just a good, comforting dessert. I left some of these at home for me too, hahaha.

I’ve also spent the last couple of weeks making gumpaste peonies for the wedding cake, and they’re finally finished! The colors are a little dark in the pictures because the gumpaste needs a few more days to dry, but here’s a few progression shots for ya’.

Image

Lil’ buds

Image

The first layer of petals

Image

Second layer

Image

Third layer. Lookin’ good so far!

Image

Fourth layer, getting too big for the egg carton!

Image

A finished peony; my babies are all grown up! I’m pretty proud of how these turned out. I don’t have TOO much experience making gumpaste flowers and I’ve never made peonies before, so these ended up being a lot of work and trial and error. In total it took me almost 3 weeks to finish all of these (this includes drying time and all the breaks I took in between for work and the dessert buffet, haha), but I would definitely say it was worth it.

Image

It’s kinda hard to see all the veining in there, but it’s there! The flowers are super delicate, so here’s hoping they actually make it to the wedding. Hope you all enjoyed my very pink post, and look forward to more!

Standard
Cake, Petit Four, Recipes

Coconut and Brown Sugar Tea Cakes

Image

I once took an international cooking class, and one day a woman from South Africa came in and made the class a yellow cake that she had soaked in a syrup made from milk and sugar; I can’t for the life of me remember what that cake was called, but the taste definitely lingered in my mind and on my tongue.

Image

That is where most of the inspiration for these cakes came from. It had some very simple flavors, but it really just reminded me of something my grandma would make (who by the way, is most definitely not from South Africa); it’s simple but undeniably good. I proceeded to use some flavors that I know she would appreciate, and coconut and brown sugar were the answers!

The coconut adds a nice chew to the cakes and the brown sugar gives them a deeper flavour than regular sugar could provide. I also love that these cakes remind me of little snowballs! They’re a tad sweeter than I would normally make a cake by itself, but they make the perfect compliment to a bitter cup of tea or coffee.

Coconut and Brown Sugar Tea Cakes

makes 50 1-inch cakes

110 g cake flour

1 g salt

55 g dessicated coconut, unsweetened, plus more to coat cakes

90 g unsalted butter

125 g brown sugar

2 large eggs

For soaking syrup:

170 g coconut milk

70 g brown sugar

Preheat oven to 380F, and lightly oil mini (1″ round) silicon molds. In a bowl, whisk together cake flour and salt until there are no more lumps, then whisk in dessicated coconut until combined. Set aside.

In a bowl of a stand mixer fitted with a paddle attachment, combine unsalted butter and 125g brown sugar, and cream together well on medium speed for 3-4 minutes, or until mixture is very fluffy and pale. With mixer running, add eggs one at a time, until eggs are absorbed in the butter; make sure to scrape the bottom of the bowl with a rubber spatula as needed. Mix until everything is combined.

Reduce speed to low, and slowly add in flour mixture. Mix just until combined. Pipe batter into oiled molds 3/4th of the way up, and bake about 8 minutes, or until cakes are firm and golden brown around edges.

While cakes are baking, make soaking syrup: combine coconut milk and 70g brown sugar in a small saucepan, and heat just until sugar is completely dissolved. Stir well with a rubber spatula to prevent scorching. While both cakes and syrup are still warm, brush syrup over each cake, making sure that cakes are soaking up all the syrup; think tres leches cake. Let cakes cool a bit, then toss in dessicated coconut to coat. Keep refrigerated, and enjoy!

Standard
Breakfast, Cake, Custard, fruit, Gluten Free, Recipes

Gluten Free Loquat and Almond Clafoutis

It’s springtime, which means stone fruit are well in season. The loquat tree in Robert’s backyard is lookin’ pretty good nowadays, so I wanted to make something with the fruit while it lasted.

Image

Loquats are very tender, sweet and slightly tart fruits, almost like apricots. The texture and color are comparable to cantaloup.

Image

The finished clafoutis. A clafoutis is a french baked dessert that traditionally has cherries, and is almost like a cross between a custard and a pancake.

Image

Some of the ingredients.

Image

Dry ingredients. Since I only had sliced almonds instead of almond flour, I pulsed the almonds, salt, and granulated sugar together until it became a fine powder.

Image

After adding the wet ingredients. The batter should look thin, almost like crepe batter.

Image

After baking.

Image

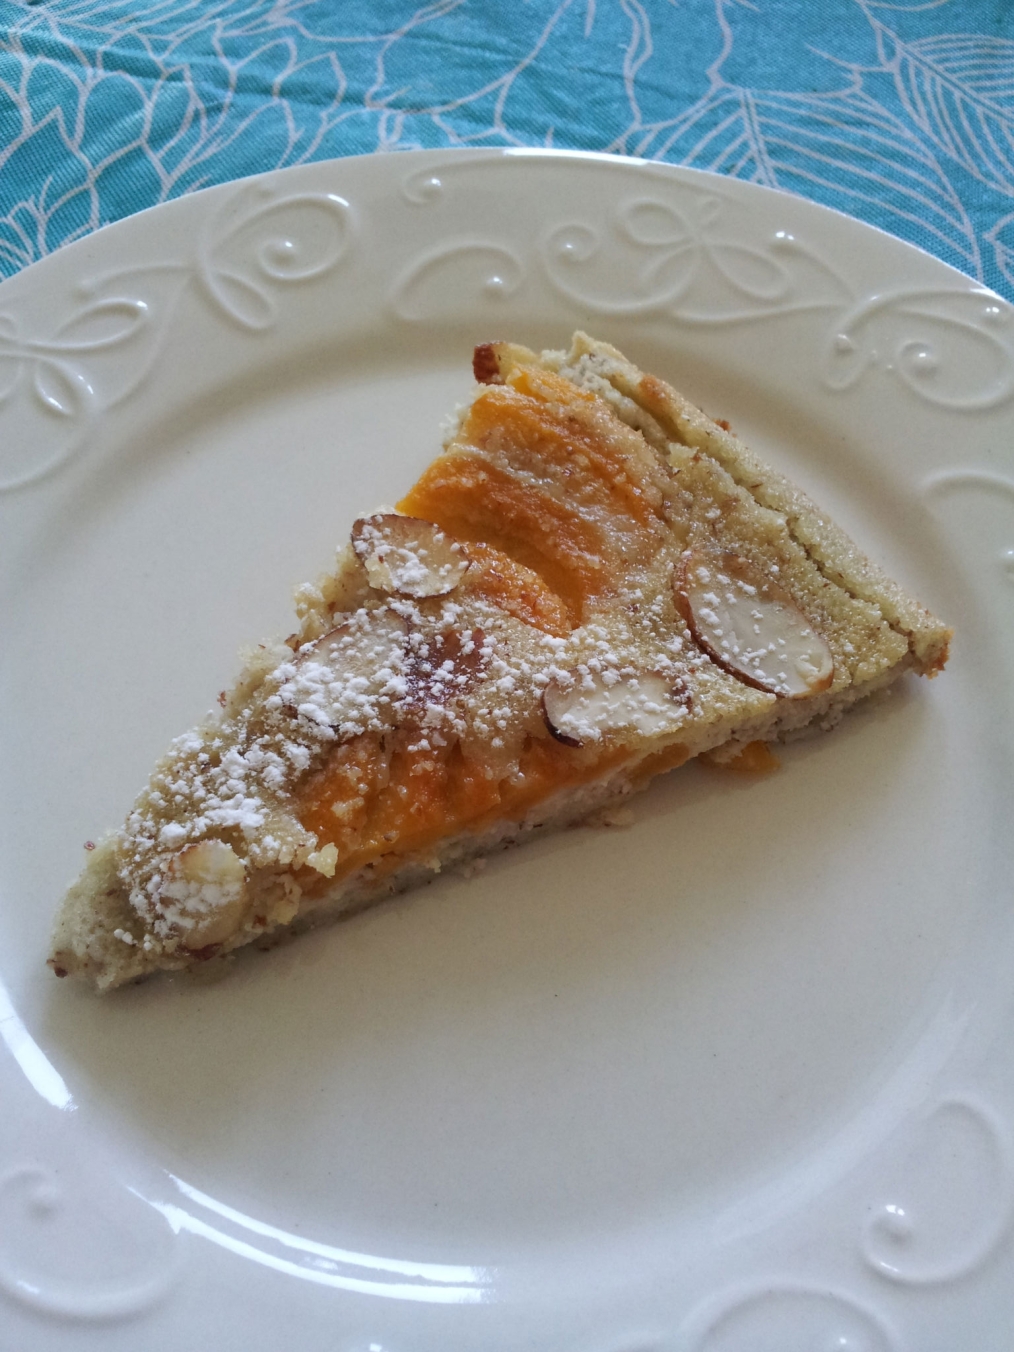
A slice for me 🙂 Over all, this recipe was really easy and produced some good results. The almonds added a subtle sweetness, and the loquats were perfectly ripe, and not overly tart or sweet.

Gluten Free Loquat and Almond Clafoutis

for 1 (10″) baking dish

recipe adapted from GourmandInTheKitchen

6 ripe loquats, peeled, pitted, cut in half lengthwise, and sliced thinly

1 cup coconut milk

3 large eggs

1 tsp. vanilla extract

1 Tablespoon brandy or cognac

2/3 cup granulated sugar

1/2 cup almond flour (or you can pulse some almonds like I did)

1/4 tsp. salt

1/4 cup sliced almonds

powdered sugar, for dusting

Preheat your oven to 375F, and grease a 10″ ceramic baking dish.

Using a blender, pulse together almond flour, salt, and sugar until there are no lumps. Add your coconut milk, eggs, vanilla, and brandy, then blend until smooth. the batter should be really thin.

Arrange your slices of fruit neatly on your baking dish, then slowly pour batter over the fruit. Be careful, as it may displace some of your arrangement.

Carefully place dish in oven, then bake 35-40 minutes or until top of clafoutis looks golden brown. Let sit at room temp for 10-15 minutes, then dust with powdered sugar. Serve warm or room temperature. Enjoy!

Standard
Cake, Recipes, Vegan

[Vegan] Coconut Lemon Poppy Cake

As someone who makes pastries for a living, I feel almost obligated to make my own wedding cake. Don’t get me wrong, I really REALLY want to. It’s ridiculously tempting. The only thought holding me back is figuring out how to get it to the wedding safely and where I would keep it until we need it.

So maybe I won’t make it myself, we’ll see. That thought is still on the table. As for what flavor we want, Robert and I really like coconut, and since the wedding will be in Spring, I knew I wanted to incorporate some lemon in there somehow.

Image

Today I made a mini vegan coconut and lemon poppy cake, with a creamy, fluffy coconut frosting. While our wedding cake probably won’t be vegan, I thought this would be a good (and delicious) challenge for myself.

Image

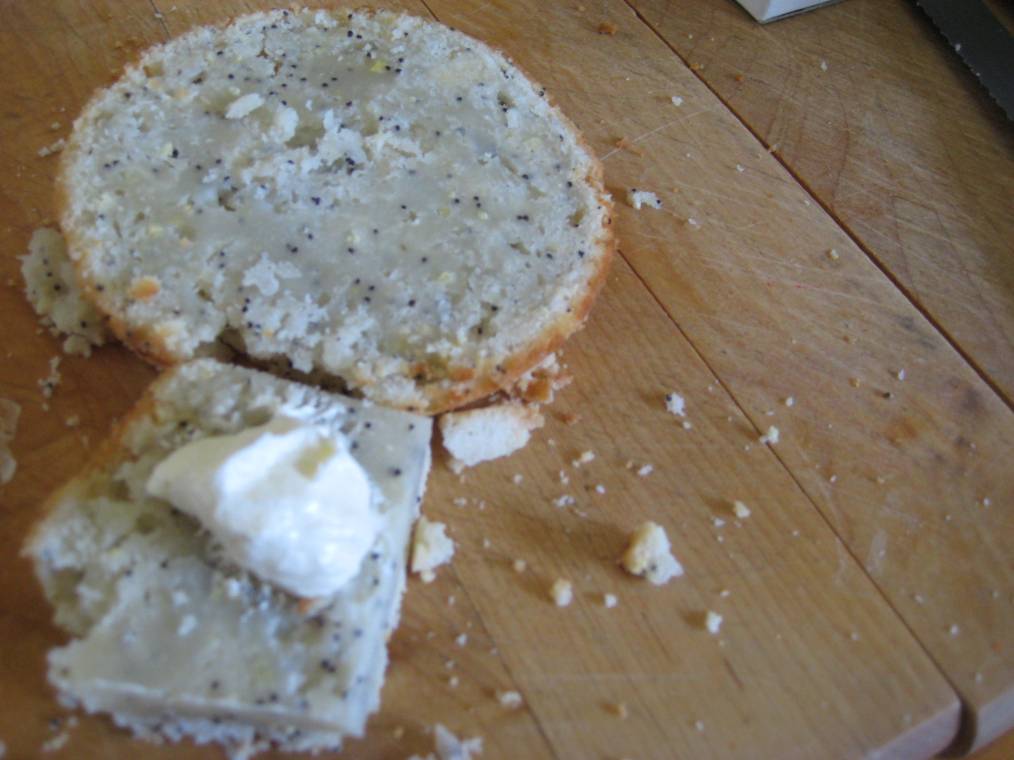
What was left of the scraps. Neither of us could resist snacking on them (yay baker’s treat!).

Image

This cake came out surprisingly moist, soft, and not over-the-top sweet, which I definitely enjoyed. I was tempted to soak it in a Limoncello simple syrup, but after tasting it I knew it didn’t need any help in the moisture department. The frosting I used contains coconut oil, making it fluffy but also gave it a smooth and melt-in-your-mouth sort of feeling.

Long story short, this cake definitely did not disappoint, and I won’t hesitate to make it again. The fact that is dairy-free and eggless is just an added bonus to how good it is (and how easy it was to make)!
Coconut Lemon Poppyseed Cake

Makes 2 (4 inch) cakes

100 g sugar

3 Tablespoons lemon zest

110 g oil

200 g cake flour

1 g salt

1/2 teaspoon baking powder

200 g coconut milk

1 teaspoon poppy seeds

Preheat your oven to 350F. In a mixing bowl fitted with a paddle attachment, mix your sugar, lemon zest, and oil together until combined. In another bowl, whisk together cake flour, salt, and baking powder. With mixer running, slowly add in flour mixture, mixing until incorporated. Scrape sides of bowl. With mixer running again, stream in coconut milk and then add in poppy seeds. Scrape sides of bowl again and let mixture mix until everything is fully incorporated.

Lightly oil 2 (4 inch) cake pans and divide batter between pans. Bake at 350F for 25-30 minutes, or until a toothpick inserted in the center comes out clean. When cakes are done, let them cool completely before removing from their pans.

Vegan Coconut Frosting

Makes about 4 cups

250 g Butter-Flavored Shortening, room temp.

175 g coconut oil, room temp.

175 g powdered sugar, sifted

1/2 teaspoon vanilla extract

In a mixing bowl with a paddle attachment, cream together shortening and coconut oil. Slowly add in powdered sugar, mixing until fully incorporated. Scrape bowl. You can add more powdered sugar if you like, according to your tastes. Add vanilla extract and mix until your frosting is light and fluffy, making sure that all ingredients are fully incorporated.

*I would strongly advise refrigerating any cakes that use this frosting as the coconut oil does have a tendency to melt at any temperature higher than room temp.

Standard