Cake, Caramel, Chocolate, Cookies, Custard, DIY, fruit, Petit Four, Places, Wedding

Wedded Bliss Part 4: The Cake, The Day

399906_10201060574337950_178797941_n

After over a year of planning, last Saturday Robert and I finally got married! A couple of hours ago we just got back from our amazing honeymoon (woot Vegas!) so now I finally have some time to show you guys a couple of pictures. I’m not going to post up too many pictures just because the photographers we hired need a couple more weeks before all the images are edited, but I just wanna give you guys a taste of our special day.

IMG_5428

Macaron craziness. I made roughly 400 macarons to give as our favors for our guests. Soo much effort but it was totally worth it! Each person got a raspberry lychee rose macaron, a hazelnut caramel macaron, and a dark chocolate, olive oil, and fleur de sel macaron.

IMG_5438

All packaged and ready to go! Because of the massive number that I had to make and how tiny our apartment is, I would say this was more than a challenge, but it all worked out in the end. I also had some help from the hubby with packaging them 🙂

User comments

Trying to Tetris the tiers of our cake into our fridge. The cake was literally the easiest part of the wedding planning. For a long time I already knew what I wanted to do and how I wanted it to look, and it definitely helped that I build wedding cakes at work all the time.

164641_10201060582378151_1024440684_n

The finished cake: coconut sponge cake, lemon curd filling, and Italian buttercream. We had one of Robert’s friends help us deliver the cake and stack it the morning of, so that was a good amount of weight off of our shoulders and it turned out looking just as awesome as I imagined. I love how rustic and homemade (but also clean and finished) it looks.

395642_641188255894925_800580002_n

Cutting into our cake. The gumpaste peonies held up throughout delivery and the day of, so I’m pretty proud of that as well.

404745_10200502927830170_862987853_n

Anyway, I hope you guys enjoyed my little post about our big day. The weather was amazing, the food was amazing, and the entire day couldn’t have been any better. I am now happily married to the most amazing man I’ve ever met, and looking forward to a lifetime of happiness with him. While I didn’t get a chance to post about some of the other wedding-related crafts I made (our guest book, our painting, the chair hangs, etc.) hopefully you all got a good taste of what went on during these “Wedded Bliss” posts. Love you guys, and thanks for reading! 🙂

Standard
Cake, Caramel, Custard, fruit, Petit Four, Recipes

Visions of Sugar Plums and Work, Work, Work

Image

Needless to say but by my lack of posts, I think you can tell I’ve been busy lately! Winter is finally setting in around these parts (regardless of today’s 90 degree weather), and so is the crazy holiday season, hence the crazy schedule I’ve been given at work. So to my readers out there, I sincerely apologize, but I can assure you that I’ve been working on more stuff to show you guys! Sometimes the 10-hour work days and long weeks just get in the way.

Image

Plums are in season now, and what better flavor to pair them with than the warm notes of caramel and vanilla? Here I have a vanilla bavarois bar with caramelized plums and almond sponge cake. The vanilla and caramel definitely tone down the tartness of the plum, and round it out to make a pleasant (albeit cold) winter dessert.

Image

While plums definitely aren’t something you traditionally see on a winter dessert menu, I think it’s time to change that, don’t you? I mean, it’s almost 2013, people! It’s time to give the pears and apples a rest and let the underdogs shine!

Caramelized Plum and Vanilla Bar

makes 10 (3-inch) bars

for Caramelized Plums:

90 g  plum, diced small (almost brunoise) and room temp.

30 g granulated sugar

1 Tablespoon spiced rum

In a small saucepan, melt sugar over medium heat, stirring with a rubber spatula until lightly golden. Add diced plum and toss to coat in caramel. Cook sugar gets slightly darker, then deglaze pan with rum and cook until dissolved. Using a small half-sphere silicon mold, divide plums between 10 molds and compact into sphere, making sure to use all liquids. Freeze until firm.

For Vanilla Bavarois:

200 g heavy cream

5 g powdered gelatin

25 g cold water

150 g milk

45 g granulated sugar

45 egg yolks

1/2 vanilla bean, scraped

Vanilla Almond Sponge, cut into rectangles to fit bar molds

Bloom gelatin with water, set aside. Whip heavy cream until it reaches very soft peaks, and set aside.

In a small saucepot, combine milk and vanilla bean, and heat over a medium flame. In a bowl, whisk together sugar and yolks, then temper yolks into milk mixture, cooking until it thickens slightly (basically make an anglaise). Strain out vanilla bean, then stir in gelatin until completely melted. Fold anglaise into whipped cream, and divide between 10 silicon bar molds (you may have a bit extra leftover). Press sponge cake into bavarois until it is flush with the base, then freeze until firm.

For assembly:

While bavarois is still frozen, pop out of molds and onto a wire rack on top of a lined sheet pan. Slice a thin piece of plum and place on top of bars, then pop out frozen caramelized plums and place on top. Heat some clear glaze until thin enough to pour, then slowly pour over tops of each piece until completely coated. Refrigerate until set.

Standard
Candy, Caramel, Recipes

Vanilla Butter Caramels

Whenever I cook, I always try to consider what I have on hand so I can avoid going through the hassle of making a trip to the grocery store. I love recipes that use simple household ingredients that you can find in anyone’s pantry, and this happens to be one of them!

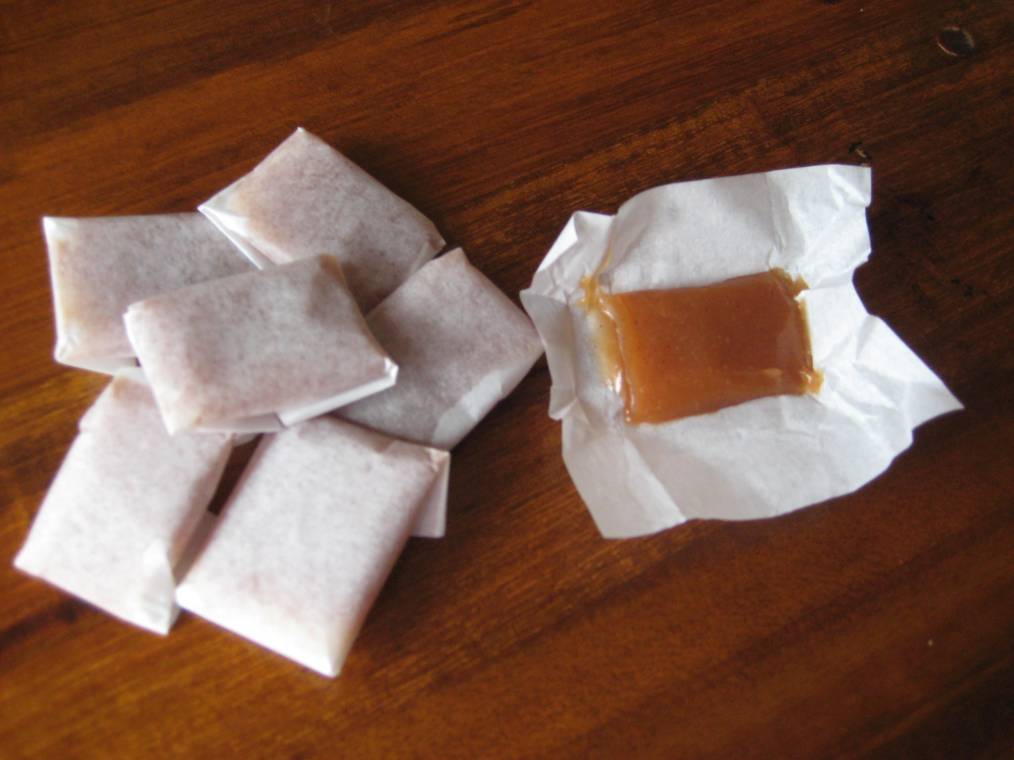
Yesterday I made some vanilla butter caramels; they’re both chewy and soft, and almost melt away in your mouth.

So I know that this is candy-making blasphemy, but I didn’t use a candy thermometer. I know, I know, but those of us at KnitterBakerPateaChouxMaker are also risk-takers, and this recipe is simple enough to follow without one, I promise!

Image

I love the beautiful sheen this caramel has, and the little flecks of vanilla bean just bring it to another level that is incomparable to any flavor a plain extract would have brought. Oh, and they taste pretty damn good too.

Vanilla Butter Caramels

makes about 36 pieces

300 g sugar

170 g corn syrup

1 vanilla bean, split in half lengthwise and scraped

80 g water

130 g cream

40 g unsalted butter, cut into small pieces

Line a small sheet pan with a silicon mat or parchment paper sprayed lightly with oil. This recipe is really small, so I used metal bars to make an 11″x 5″ frame to pour the caramel into. Set pan aside.

In a medium-sized pot, combine sugar, corn syrup, vanilla beans and pods, and water, and mix until just combined. When choosing your pot, pick one with tall sides, as the caramel will bubble up a lot later on. Make sure there are no granules of sugar stuck to the sides of the pot.

Over medium heat, bring the mixture to a boil, swirling the pot from time to time. Do not stir! Let sugar boil until it reaches a deep golden brown. Immediately turn off heat, then slowly pour in 1/3 of the cream (the caramel will bubble furiously, so be careful to avoid steam burns!). Whisk in the cream until fully incorporated. Pour in another 1/3 of the cream, and whisk again. Then pour in the rest of your cream, and whisk until thoroughly combined. Add your butter and whisk until completely emulsified.

Discard your vanilla pods and quickly pour caramel into your frame or sheet pan. Refrigerate caramel until it is fully set, at least 1 hour. Using a clean, hot knife, cut into 36 pieces and wrap in wax or parchment paper. Store in an airtight container and enjoy!

Standard
Cake, Caramel, Recipes, Vegan

Pound Cake, Dulce de Leche, and Trials in Vegan Baking

“Vegan” can sometimes be a scary word, especially in baking. What? You want me to make a cake without eggs AND butter?? But that’s what makes cake so good! I personally am not vegan, because I just love meat. There. I said it. But as someone who cooks and bakes as a profession, I do love a good challenge, and replacing animal products with things that won’t sacrifice taste and texture are all part of the job!

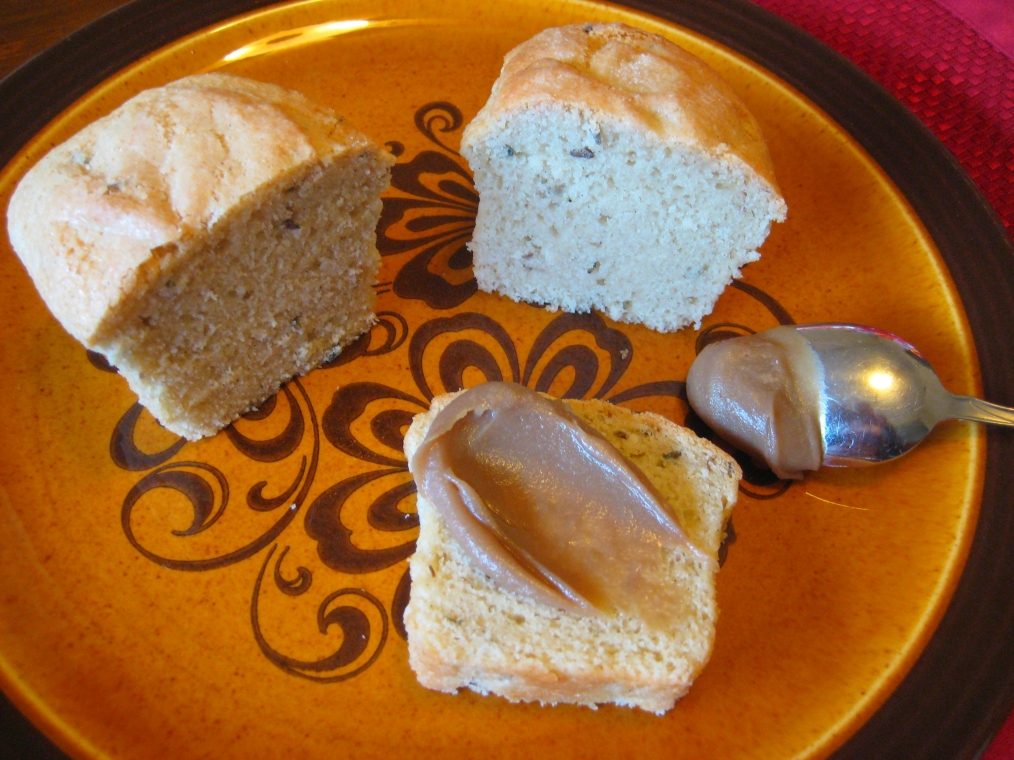
Yesterday I made a Lavender and Almond Pound Cake and Coconut Dulce de Leche, both of which are vegan but still very flavorful. Keep in mind though, that just because they’re vegan doesn’t necessarily mean they are healthy! No promises!

Image

I tried to keep the list of ingredients to a minimum, ruling out things that you wouldn’t typically find in  a home kitchen (i.e. vegan butter or tofu as substitutes).

Image

I will also admit that I LOVE this coconut dulce de leche. There’s only 2 ingredients, it’s creamy and ridiculously rich, and it cooks infinitely faster than your typical condensed milk dulce de leche. Plus, I also happen to love coconut!

Lavender Almond Pound Cake

Makes 2 medium loaves or 4 small loaves

10 oz Almond milk

2 Tablespoons dried culinary lavender

1 vanilla bean, split in half and scraped

11 oz sugar

6 oz vegetable oil

16 oz all purpose flour

4 oz almond flour

2 Tablespoons baking powder

1/2 teaspoon salt

In a small saucepot over medium heat, combine almond milk, lavender buds, and vanilla beans and pod, and bring to a simmer. Remove from heat and set aside.

Whisk together all purpose flour, almond flour, baking powder, and salt in a bowl, set aside.

In the bowl of an electric mixer fitted with a paddle attachment, mix together sugar and oil. Add in half of the flour mixture, mix until combined. Remove vanilla pods from milk mixture, then add half of the milk to the batter and mix until combined. Scrape the bottom of the bowl with a rubber spatula, then add the rest of the flour mixture, let mix, then  the rest of the milk mixture. Scrape bowl again and let mix until batter becomes a uniform mixture.

Divide batter evenly between oiled loaf pans and gently tap on the counter to smooth out tops of loaves. Sprinkle a small amount of sugar evenly over the tops of loaves, bake at 350F for 30-35 minutes, or until a toothpick inserted in the center comes out clean.

Coconut Dulce De Leche

Makes 1 1/2 cups

1 (14 oz) can of coconut milk

6 oz brown sugar

In a small saucepot over medium/low heat, combine coconut milk and sugar, and bring to a low simmer. Let mixture simmer for 30 minutes, stirring and scraping sides and bottom of pot occasionally to prevent burning. After 30 minutes, the mixture should look gooey but still somewhat thin. Remove mixture from pot into a stainless steel bowl over an ice bath, letting it cool and stirring occasionally until it thickens and comes to room temperature. When completely cooled, it should be the consistency of a creamy peanut butter. Store in an airtight container and refrigerate.

Standard
Cookies, Recipes

Alfajores

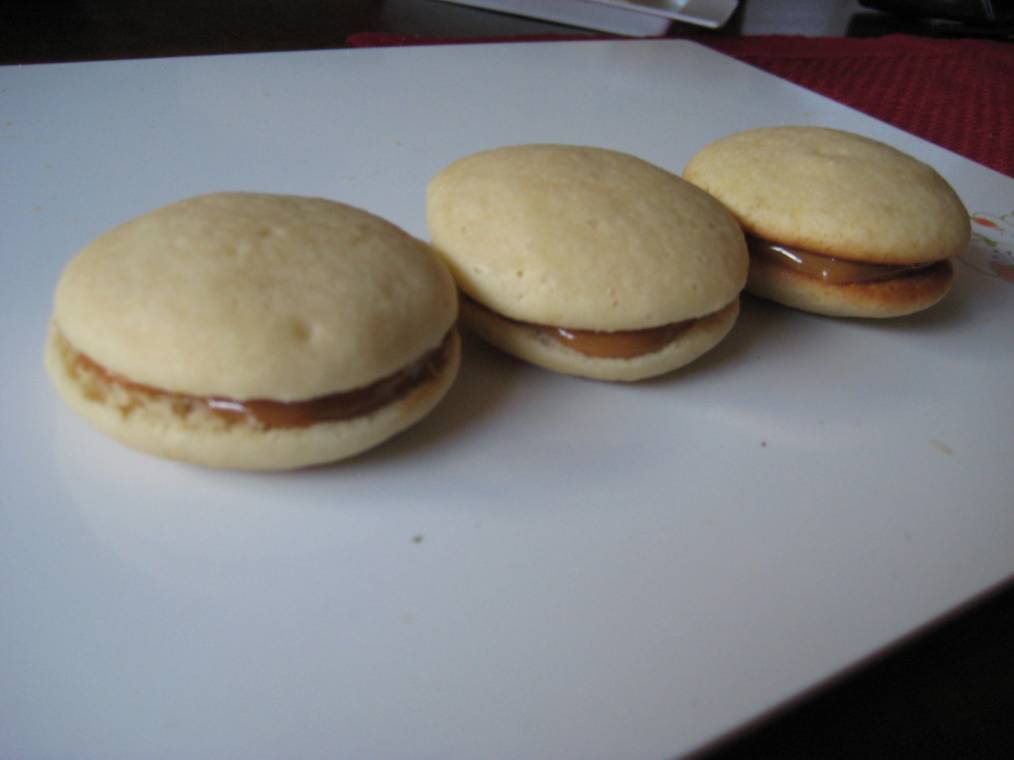
Today Robert and I made Alfajores, a soft, Spanish cookie that is usually sandwiched with dulce de leche or a fruit jam. I took a recipe that I’ve previously used from Martha Stewart and made my own adjustments because I wanted it to be more cake-like, almost like whoopie pies, and with some minor adjustments I think I was pretty successful! After all, I am a sucker for whoopie pies…

Image

Ingredients.

Image

Creaming the butter and sugar for several minutes. Not a step to be missed!

Image

Scooping out the dough. My scoop was pretty big, and since they spread pretty well I ended up with  some pretty big cookies. Definitely NOT a problem to me!

Image

Sandwiched with some gooey dulce de leche, possibly the best part of this cookie. The end result was really soft and tender, with a good crumb. Definitely would recommend eating it with a glass of milk or juice!

Alfajores, adapted from Martha Stewart Recipes

makes 30 sandwiches, or 60 cookies

3 cups All Purpose flour

2 tsp baking powder

1 tsp salt

3/4 cup unsalted butter, soft

1 1/4 cup granulated sugar

2 large eggs

1/2 cup milk

3/4 cup orange juice (I used guava juice, it’s your choice!)

1 tsp vanilla extract

dulce de leche, or fruit jam

In a bowl, whisk together flour, salt, and baking powder, set aside.

In a mixing bowl with a paddle attachment, cream together butter and sugar on medium speed for 4-5 minutes, until light and fluffy (you want it to look almost white), then scrape bottom and sides of bowl with a rubber spatula. With mixer running, add eggs one at a time, until thoroughly incorporated. Scrape bowl again.

In a separate bowl, whisk together milk, juice, and vanilla extract. Do NOT do this ahead of time!** With mixer running, add 1/2 of flour mixture to batter, let mix until incorporated. Add 1/2 of milk mixture to batter, mix until incorporated. Scrape bowl, then add the rest of the flour mixture and milk mixture in the same manner. Scrape the bowl, and let mix until well combined.

Scoop out dough onto a lined sheet pan, keeping cookies 1 1/2 to 2 inches apart. Bake at 350F for 14-16 minutes, or until slightly golden and firm to the touch.

When cookies have cooled, spread a layer of dulce de leche or your favorite jam between two, and make a delicious cookie sandwich!

** As it turns out, mixing milk and citric acid and letting it sit makes some lumpy milk! Guess I must have forgotten that part from the cheese-making class I took…

Image

Packed and ready to take to the office tomorrow! Happy eats!

Standard
Candy

Fleur de Sel and a New Year

And with the new year, I bring you a new blog! As some of you may know, I have had a few blogs in the past, but this time I decided to start fresh. I wanted something that would highlight the food/clothes/whatever I make, without being as personal as the previous ones have been. I also thought it would be a good time to start writing again since I just finished school and actually have time for it now (more or less).

Today the boyfriend and I made fleur de sel caramels; chewy, buttery, and not overly sweet as many caramels tend to be. And with every granule of fleur de sel that touches the tongue, you get a nice pop of flavour.

I got the recipe from one of the two new (and very cute) books I bought this weekend, Sugar Baby.

Some things I learned from making these:

  1. Quality ingredients make ALL the difference and are well worth the price (if you can afford it!).
  2. Fleur de sel is expensive! Or maybe Whole Foods is. Possibly both. I will definitely be saving that one in the pantry for special occasions…
  3. Caramel is kinda a pain in the butt to cut up, which leads to snacking of all the bad pieces, which leads to terrible, terrible things….
  4. USE GOOD BUTTER. I will refer you back to number one! These caramels were really smooth and buttery, but not overly rich, which I’m sure I can attribute to the good butter. Since we had some leftover this morning, Robert and I used a pat of it when we made scrambled eggs, and OHMIGOD. yep. I don’t think I can ever go back to buying the $2/# stuff at Stater Bros…

Anyway, I hope ya’ll enjoy my new blog, and have a wonderful 2012! My new year’s resolution is not necessarily to lose weight, but to definitely not gain it. We’ll see what’ll happen with all these caramels sitting around…

Standard