Cake, Caramel, Chocolate, Cookies, Custard, DIY, fruit, Petit Four, Places, Wedding

Wedded Bliss Part 4: The Cake, The Day

399906_10201060574337950_178797941_n

After over a year of planning, last Saturday Robert and I finally got married! A couple of hours ago we just got back from our amazing honeymoon (woot Vegas!) so now I finally have some time to show you guys a couple of pictures. I’m not going to post up too many pictures just because the photographers we hired need a couple more weeks before all the images are edited, but I just wanna give you guys a taste of our special day.

IMG_5428

Macaron craziness. I made roughly 400 macarons to give as our favors for our guests. Soo much effort but it was totally worth it! Each person got a raspberry lychee rose macaron, a hazelnut caramel macaron, and a dark chocolate, olive oil, and fleur de sel macaron.

IMG_5438

All packaged and ready to go! Because of the massive number that I had to make and how tiny our apartment is, I would say this was more than a challenge, but it all worked out in the end. I also had some help from the hubby with packaging them 🙂

User comments

Trying to Tetris the tiers of our cake into our fridge. The cake was literally the easiest part of the wedding planning. For a long time I already knew what I wanted to do and how I wanted it to look, and it definitely helped that I build wedding cakes at work all the time.

164641_10201060582378151_1024440684_n

The finished cake: coconut sponge cake, lemon curd filling, and Italian buttercream. We had one of Robert’s friends help us deliver the cake and stack it the morning of, so that was a good amount of weight off of our shoulders and it turned out looking just as awesome as I imagined. I love how rustic and homemade (but also clean and finished) it looks.

395642_641188255894925_800580002_n

Cutting into our cake. The gumpaste peonies held up throughout delivery and the day of, so I’m pretty proud of that as well.

404745_10200502927830170_862987853_n

Anyway, I hope you guys enjoyed my little post about our big day. The weather was amazing, the food was amazing, and the entire day couldn’t have been any better. I am now happily married to the most amazing man I’ve ever met, and looking forward to a lifetime of happiness with him. While I didn’t get a chance to post about some of the other wedding-related crafts I made (our guest book, our painting, the chair hangs, etc.) hopefully you all got a good taste of what went on during these “Wedded Bliss” posts. Love you guys, and thanks for reading! 🙂

Standard
Cake, Candy, Chocolate, Cookies, Crafts, DIY, fruit, Petit Four, Wedding

Wedded Bliss Part 3: Flowers and Showers

Image

Yesterday Robert’s mom was kind enough to throw me a bridal shower, and I have to say it was a lot of fun! We played games, won prizes, had awesome food, and I got to open up some great and very thoughtful gifts.

Image

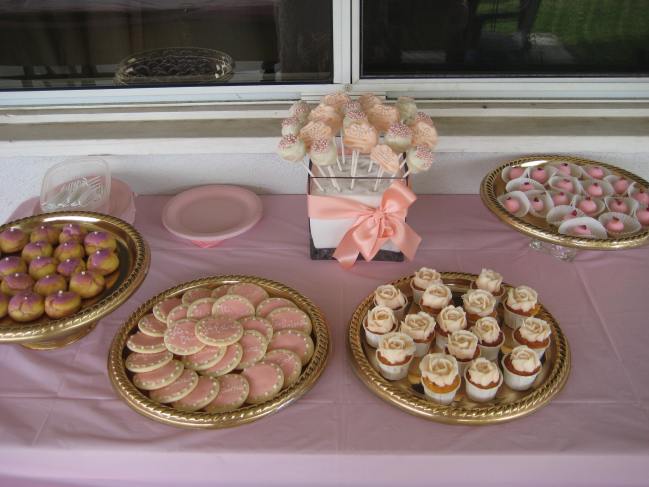
All the bridesmaids seemed to enjoy themselves as well, so I’m pretty happy about that. The theme colors were pink and gold, and I wanted to make a little dessert buffet to match that.

Image

The spread looks kinda small, but we were only expecting 20 or so people, so it ended up being just enough desserts!

Image

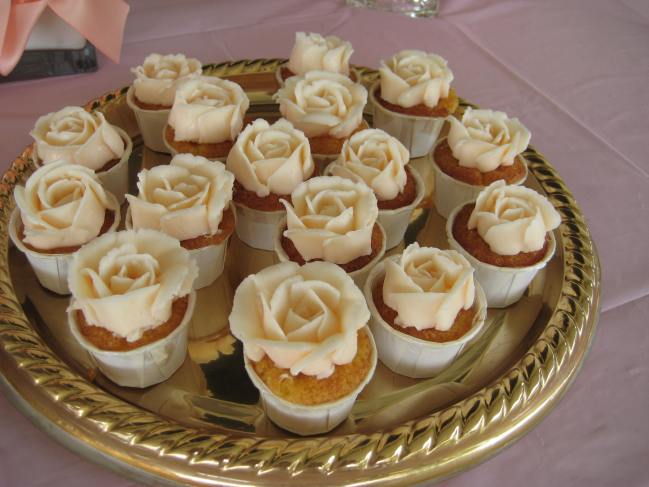
Mini almond and orange cupcakes with buttercream roses.

Image

Strawberry and rose truffles. I absolutely LOVED these babies, and they were so easy to make. Not gonna lie, I left a few of these at my house to snack on….

Image

Coconut cake pops and mango-peach marshmallow lollipops. The marshmallow lollipops turned out a little more difficult to make than I remember, but they came out really cute and pretty damn delicious so I’m proud of them!

Image

Lemon sugar cookies that say “je t’aime.” Cute and simple!

Image

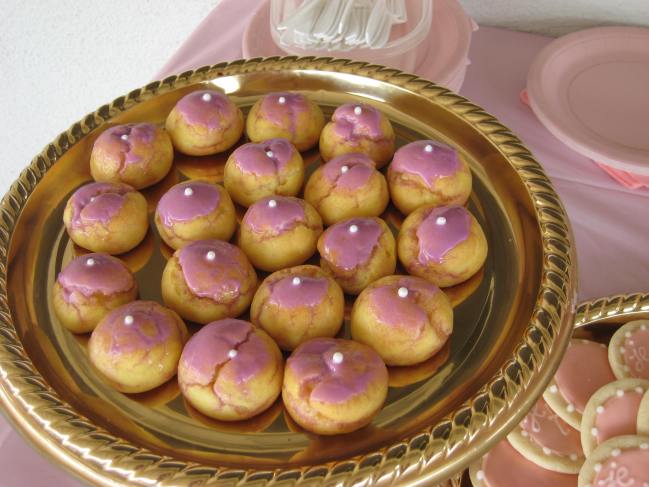
Vanilla pate a choux. Another simple flavor, but just a good, comforting dessert. I left some of these at home for me too, hahaha.

I’ve also spent the last couple of weeks making gumpaste peonies for the wedding cake, and they’re finally finished! The colors are a little dark in the pictures because the gumpaste needs a few more days to dry, but here’s a few progression shots for ya’.

Image

Lil’ buds

Image

The first layer of petals

Image

Second layer

Image

Third layer. Lookin’ good so far!

Image

Fourth layer, getting too big for the egg carton!

Image

A finished peony; my babies are all grown up! I’m pretty proud of how these turned out. I don’t have TOO much experience making gumpaste flowers and I’ve never made peonies before, so these ended up being a lot of work and trial and error. In total it took me almost 3 weeks to finish all of these (this includes drying time and all the breaks I took in between for work and the dessert buffet, haha), but I would definitely say it was worth it.

Image

It’s kinda hard to see all the veining in there, but it’s there! The flowers are super delicate, so here’s hoping they actually make it to the wedding. Hope you all enjoyed my very pink post, and look forward to more!

Standard
Cookies, fruit, Gluten Free, Recipes, Vegan

[Vegan & Gluten Free] Chestnut & Cherry Pillows

Image

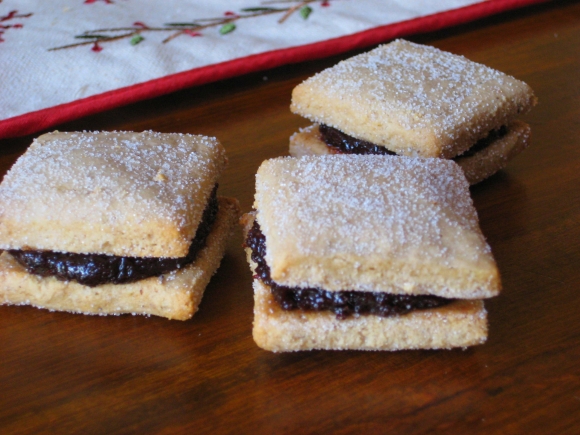
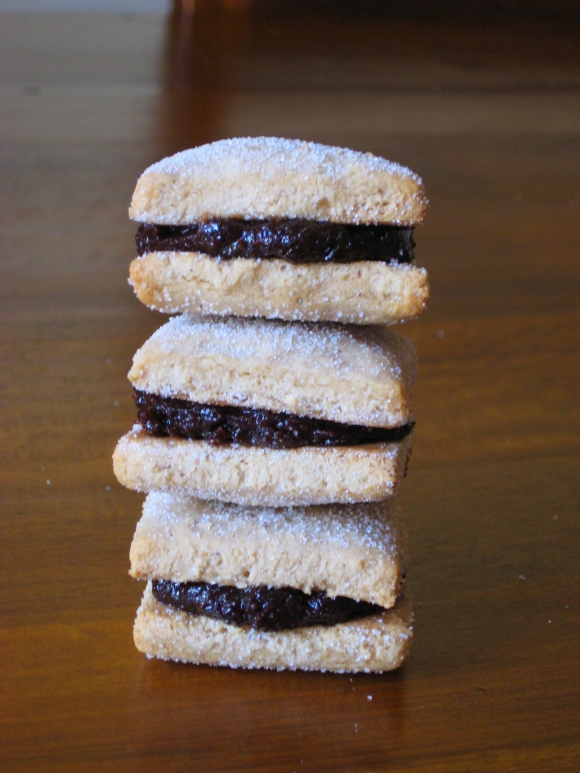
I absolutely love chestnuts in winter. They’re perfect in both sweet and savoury foods, and are synonymous with the holidays. Yesterday I paired them with a quick cherry jam, and they made just a perfectly sweet, tart, and tender cookie sandwich.

Image

I love this recipe because it’s incredibly simple and it’s just the perfect little holiday bite. The cherry filling also has a bit of vanilla bean and Grand Marnier, which gives it a bit more depth of flavour.

[Vegan & Gluten Free] Chestnut & Cherry Pillows

makes about 15 sandwiches

For chestnut cookies:

245 g chestnut paste

95 g almond flour

4 g xanthan gum

2 g salt

10 g granulated sugar, plus more for garnish

Preheat oven to 350F. In a bowl of a food processor, combine all ingredients and blitz just until all ingredients come together to form a paste. Scrape out dough onto a piece of parchment paper, then roll out dough between 2 sheets of parchment until dough is 1/8th of an inch thick. At this point you can refrigerate the dough until it is firm, or if you’re impatient like me, just carefully peel the top piece of parchment off and cut dough into 1″ squares.

Place cookies onto a parchment-lined sheet pan about an inch apart, then sprinkle lightly with granulated sugar. Bake for 8-9 minutes or until edges are golden brown. Let cool completely before filling.

For quick cherry “jam”:

260 g dried cherries

1 ea. vanilla bean, scraped

60 g Grand Marnier

60 g water

Combine all ingredients in a saucepan and bring to a boil over medium heat; be careful that the Grand Marnier doesn’t flame up (this happened the first time I made these haha). Discard vanilla bean and strain out excess liquid. Place cherries in the bowl of a food processor, and blitz until it forms a smooth paste. Cool completely. Spread or pipe filling onto half of the cookies and sandwich with the other half.

Standard
Chocolate, Cookies, Gluten Free, Petit Four, Recipes

[Gluten-Free] Faux Milanos

Image

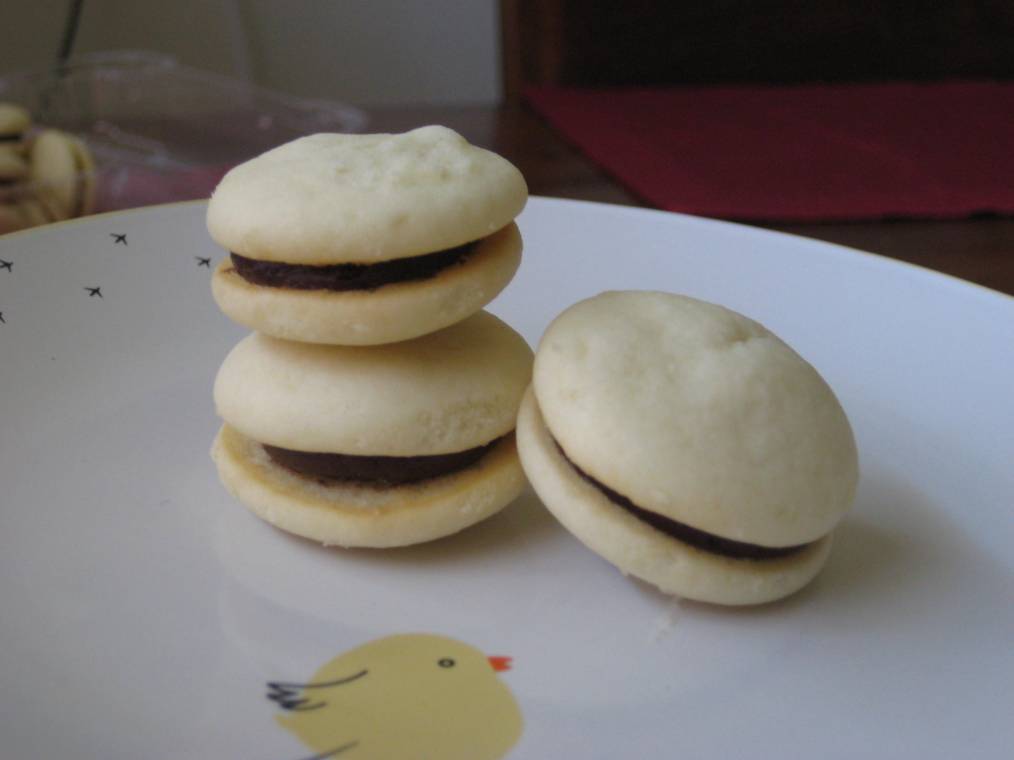
Milanos were one of my favorite cookies as I was growing up. I mean, crisp and light wafers with chocolate sandwiched in between? Where can you go wrong? Pepperidge Farm definitely knew how to hook me in as a kid (and sometimes still as an adult!).

Image

With a little extra time on my hands, I decided I wanted to make a gluten-free version of these babies, and I’ll admit that I indulged in quite a few of them before deciding to give the rest to the neighbors (sigh..). They are best enjoyed the day of baking, as they will stay crispier.

[Gluten-free] Milano Cookies

Makes 32 sandwiches

205 g almond flour

2 g salt

9 g baking powder

135 g butter

130 g sugar

75 g egg whites

3 g vanilla extract

For ganache filling:

150 g dark chocolate, chopped very finely

80 g heavy cream

2 g orange zest

Preheat oven to 350F. Whisk together almond flour, salt, and baking powder in a bowl until it is lump-free, then set aside.

In a bowl of a stand mixer fitted with a paddle attachment, cream butter and sugar together on medium-high speed until mixture is light and airy (2-3 minutes). Scrape bottom of bowl with a rubber spatula and with mixer running on medium speed, slowly stream in egg whites and vanilla extract until all liquid is absorbed by the butter and mixture is completely  emulsified.

Scrape bowl again, then with mixer running on low speed, slowly add almond mixture and mix just until all ingredients are thoroughly combined.

Using a piping bag with a medium tip, pipe batter into 1-inch logs on a sheet pan lined with a silicon mat or parchment paper, keeping cookies 1 1/2 to 2 inches apart, as they will spread quite a bit. Bake at 350F for 9 minutes, or until cookies are golden brown around edges but still slightly pale in center. Let cool completely on sheet pan before removing.

For ganache: Bring cream to a boil, then pour over dark chocolate. Whisk together until chocolate is melted and ganache is smooth and glossy. Whisk in orange zest.

When cookies are cooled, match cookies together by size and shape, then spread a thin layer of ganache on one side and sandwich with the other. Cookies are best enjoyed the day of baking.

Standard
Chocolate, Cookies, Petit Four, Recipes

Black Sesame and Lemongrass Macarons

Image

After seeing Sadaharu Aoki’s black sesame eclair, I knew I wanted to make some kind of pastry with black sesame. For some reason it had never occurred to me that this flavor would work well in desserts, but considering all the asian desserts I’ve had that were either covered in sesame seeds or consisted mainly of them, it all made sense; the nuttiness and slightly bitter aftertaste balances out with whatever sweet ingredients you want to combine them with.

Image

So with this knowledge I decided I wanted to make an Asian-inspired macaron, but wanted to stray away from the typical green tea or coconut. Lemongrass it is! I love how the citrus-y floral aroma brightens up the entire cookie and gives the ganache in the center a nice flavour without being too aggressive.

Image

Black Sesame and Lemongrass Ganache

makes enough to fill 100 macarons

180 g heavy cream

60 g lemongrass (about 2 stalks, trimmed and cleaned)

70 g black sesame seeds

225 g milk chocolate

With a mallet or a dull object (I used the back of my knife), bruise lemongrass until the stalks open up in the center. Cut into 2 inch pieces and combine with cream in a small saucepot. Bring cream to a boil, then turn off heat and let steep 30 minutes, covered. Set aside.

In a saute pan, toast sesame seeds until fragrant and until some of the seeds begin to pop. Remove from heat. Using a spice grinder, grind seeds (while still slightly warm) until oils are released and it turns into a smooth paste; this may take a few minutes.

In a bowl combine milk chocolate and  sesame paste. Strain your cream mixture and bring cream to a boil again. Pour over chocolate and sesame paste, then whisk until ganache is smooth. Keep refrigerated until ready to use.

For the macaron shells, I would recommend using My Food Geek’s recipe, or any recipe that uses the Italian meringue method. Happy Eats!

Standard
Cake, Cookies, Recipes

Red Velvet Mini Whoopie Pies

Image

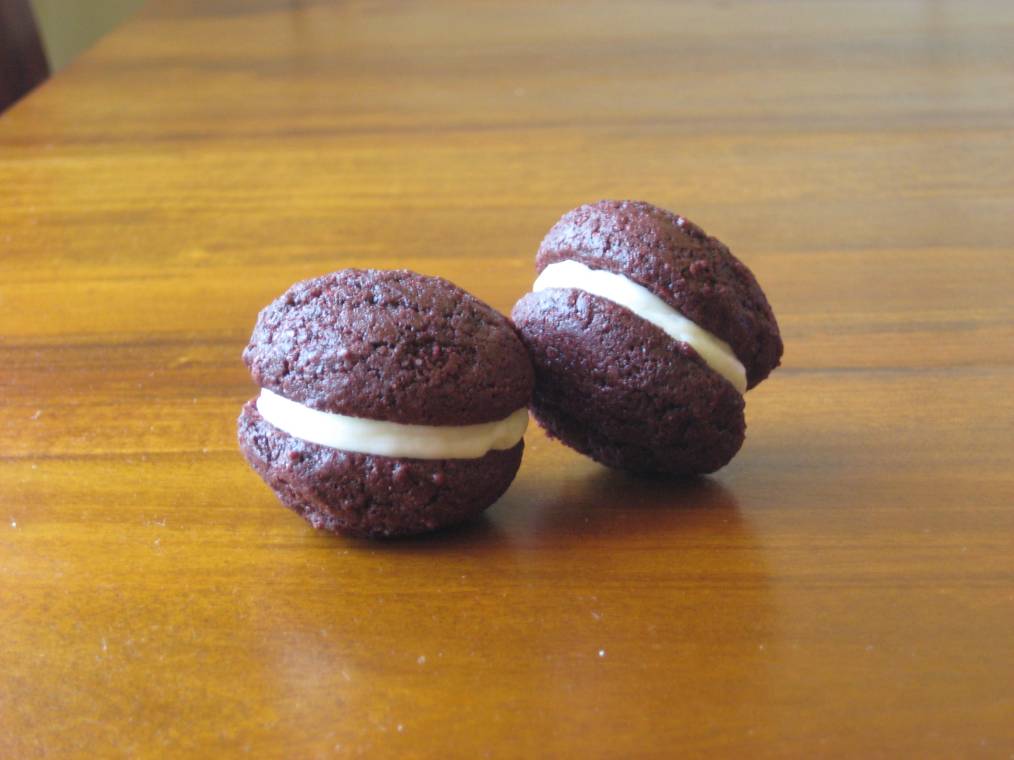
If you’re an avid reader of my blog, you probably know by now that I’m a sucker for a good cookie, especially one of the sandwich variety. Whoopie pies are no exception here! Yesterday I decided to be a tad adventurous and try to come up with my own red velvet whoopie. I mean, I had all this cream cheese lying around… what else was I going to do with it than fill up some sammies?

Image

While this recipe is a bit more… time sensitive, I guess, than most cookie recipes, it’s definitely worth the effort when they’re done. I would also strongly suggest baking and filling these cookies the night before you need it, because letting them chill overnight will improve both the taste and texture, leaving you with a moist, tender cookie.

Red Velvet Mini Whoopie Pies

Makes about 20 (1″) sandwiches

175 g All Purpose flour

30 g cocoa powder

1 g salt

65 g vegetable oil

110 g sugar

1 large egg

45 g whole milk

15 g lemon juice

5 g baking soda

7  g red gel color

Preheat oven to 350F, and line a large baking sheet with parchment paper or a silicon mat. Sift together flour, cocoa powder, and salt. In a bowl of a stand mixer fitted with a paddle, mix together oil and sugar. Add your egg,  and mix until combined. Add your dry ingredients, and mix just until combined. With a rubber spatula, scrape bottom of bowl, then turn off mixer.

This is where it gets kinda, science experiment-y. In a tall pitcher or glass, combine milk and lemon juice, and let sit about 2 minutes. If it curdles, that’s good! (honestly I only added this step because I was out of buttermilk, and soured milk is a good substitute for that!). Stir in your red food color, and then stir in (quickly!) your baking soda. If you’ve ever made a volcano in science class, you probably recall that baking soda + an acid bubbles up quite a bit! Turn your mixer back on, then with the mixer running, stream your liquid mixture into the batter, scrape the bottom of your bowl, and mix just until all ingredients are incorporated.

Scoop (or pipe) out your dough onto your lined sheet pan, and bake for about 7 minutes, or just until tops of cookies are firm. Cool completely before filling.

For the filling, I didn’t really use any recipe, I just paddled together cream cheese, a couple tablespoons of lemon juice and some sifted powdered sugar until I got the flavor and consistency that I wanted. Fill yer cookies, store in an airtight container, and chill overnight. Trust me, the waiting makes them taste even better, too!

Standard
Cookies, Recipes

Orange and Key Lime Ricotta Cookies

Image

On Saturday my cousin was having a pool party at her place, and since I’m not one to pass up any opportunity to bake, I wanted to make something that will package well and won’t melt out in the 90F heat.

Image

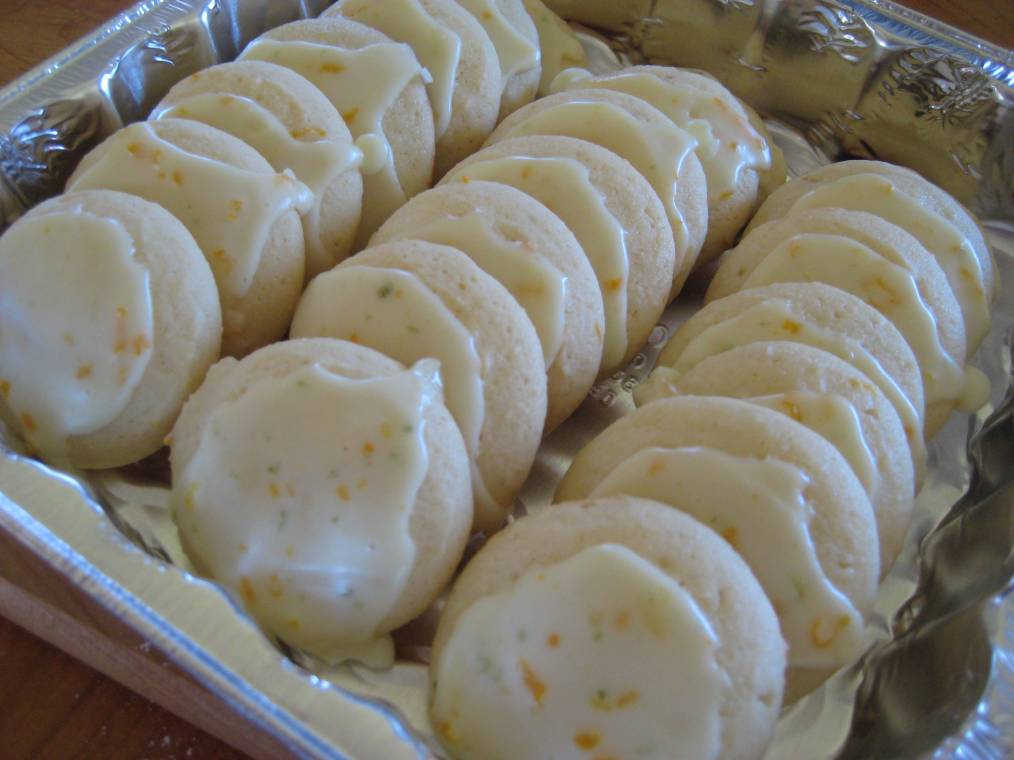
This recipe is based off of Giada de Laurentis’ Lemon Ricotta Cookies, but I wanted to add a little twist to it and switch up a couple ingredients. I also think the little flecks of orange and green zest in the glaze make such a pretty presentation!

Image

All packaged up and ready to go! These cookies came out amazingly tender and soft, and very cakey (in a good way!). They also managed to last the 2 hour car ride in 90degree heat, although I attribute that to the pastry gods, who have been quite kind lately!

Orange and Key Lime Ricotta Cookies

based on this recipe

Makes about 50 cookies

2 1/2 cups all purpose flour

1 tsp baking powder

1 tsp salt

1 stick unsalted butter, soft

2 cups sugar

2 eggs

1 (15 oz) container whole milk ricotta cheese

2 Tablespoons orange juice

1 tablespoon key lime juice

1 tsp orange zest

1/2 tsp lime zest

For glaze:

2 cups powdered sugar

2 Tablespoons orange juice

1 Tablespoon key lime juice

1 Tablespoon orange zest

1/2 tsp key lime zest

For cookies: preheat oven to 370F. In a large bowl, whisk together flour, baking powder, and salt. In the bowl of a stand mixer fitted with a paddle, cream together softened butter and sugar until light and airy in appearance. Add eggs one at a time. Add ricotta, juices, and zest, and mix until combined. Scrape sides of bowl with a rubber spatula. Add dry ingredients, and mix on low speed just until combined.

On a sheet pan covered with wax or parchment paper, scoop out cookies (about 2 Tbs per cookie), placing each about an inch apart from one another. Bake for 15 minutes, or until tops have firmed up a bit and edges are lightly golden. Let cool completely before glazing.

For glaze: whisk together powdered sugar, juices, and zest until smooth. Spoon about 1/2 tsp onto each cookie, and gently spread around the top. Let glaze set for about an hour before packaging.

Standard
Breakfast, Chocolate, Cookies, Recipes

Earl Grey and Chocolate Chunk Scones

Image

Yesterday the weather was a tad gloomy, and I was in the mood for tea. What better to go with a cup o’ tea than some scones? Better yet, tea-flavoured scones!

Image

The ingredients. Very basic pantry staples that anyone would have at home.

Image

Straining the infused cream. Make sure to press all the liquid out of the tea bags, to get all that yummy flavour out!

Image

Mixing all the dry ingredients.

Image

Turning out the dough on a lightly floured surface, then cutting into wedges. After baking they came out pretty gigantic (about the size of a large man’s fist!!) so next time I make them I think I’ll just roll it out and use cutters to keep them petit.

Image

After an egg wash and a light sprinkling of sugar.

Image

Fresh out of the oven, with the chocolate still gooey. The scones came out very tender, and the earl grey gave it a lot of warmth and a bit of a cinnamon undertone. Would not hesitate to make again!

Earl Grey Chocolate Chunk Scones

recipe adapted from Advanced Bread and Pastry

Makes 8 large scones

13 oz heavy cream

4 bags earl grey tea

12 oz bread flour

3 oz sugar

1/2 oz baking powder

1/2 tsp salt

5 oz dark chocolate, chopped into chunks

2 oz honey

1 egg

1 Tablespoon water

In a small saucepot, submerge tea bags in cream and bring to a boil over medium heat, then turn off heat and let steep at least 30 minutes, covered.

Preheat your oven to 375F. In a mixing bowl fitted with a paddle attachment, combine your bread flour, sugar, salt, and baking powder, and mix until there are no lumps. Add chocolate chunks and mix until combined.

Strain infused cream, pressing on tea bags to get any excess liquid out. Whisk together cream and honey, then add to mixing bowl with dry ingredients. Mix on low just until all ingredients are combined.

Flour a 8″ round cake pan or mold, then press dough into pan. Turn dough out onto a lightly floured surface, and cut into 8 wedges. Separate wedges onto a lightly greased sheet pan covered with wax or parchment paper, keeping scones 1″  apart.

Whisk together egg and 1 tablespoon water, then brush over tops of scones. Sprinkle tops lightly with granulated sugar. Bake 18-20 minutes, or until tops are golden brown and scones are cooked through.

Let cool and enjoy with a cup of tea!

Standard
Cake, Chocolate, Cookies, Recipes

Vanilla and Mocha Mini Whoopie Pies

I don’t know what it is about whoopie pies that I love so much; possibly the fact that it’s a cake you can hold in your hand without getting frosting everywhere, or just that it’s so fluffy and creamy just the perfect little bite of cake when they’re mini.

Image

The first time I had a whoopie pie was during a trip to San Diego; they were mini pumpkin whoopies, and they were just so adorable and perfect  for a sweet snack that I knew I had to make some of my own. This recipe uses both buttermilk and cream cheese to keep it fluffy and moist.

Image

Ready to take home! The filling is an American mocha “buttercream,” also known as 7 minute frosting. It’s ridiculously simple to make, and delightfully creamy and smooth when made correctly. I can honestly say this is one of my favorite recipes that I’ve come up with thus far!

Vanilla Cream Cheese Whoopie Pies

makes 42 mini (1″) sandwiches

120 g butter, room temperature

100 g cream cheese, room temperature

100 g sugar

200 g cake flour

6 g baking powder

2 g salt

190 g buttermilk

1 large egg

1 Tablespoon vanilla extract

In a bowl of a mixer fitted with a paddle attachment, cream together butter, cream cheese, and sugar until very light and fluffy, about 5 minutes.

Scrape sides of bowl, then with mixer running, add the egg and mix until just incorporated.

In a small bowl, whisk together cake flour, baking powder, and salt until combined. In another bowl, combine buttermilk and vanilla extract.

Add 1/3 of flour mixture to batter, mix until combined. Scrape sides of bowl, then add 1/3 of buttermilk mixture. Continue adding ingredients in this manner until all ingredients are thoroughly combined.

Line 2 large sheet pans with silicon mats or parchment paper, then pipe 1″ circles of batter onto pans, keeping each of them 1″ apart. Bake at 350F, for 8-9 minutes until cakes are risen and spring back when touched in the center. Cakes should  not brown. Let cool completely before removing from pans.

Mocha “Buttercream” Filling

Makes about 5 cups

340 g (or 3 sticks) unsalted butter, room temperature

200 g powdered sugar

30 g cocoa powder

1Tablespoon coffee extract, or VERY strongly brewed coffee

In a medium bowl, whisk together powdered sugar and cocoa powder until there are no lumps. In a bowl fitted with a paddle attachment, cream butter until very light and airy. Add cocoa sugar mixture, then (slowly) mix until incorporated. Add coffee extract, scrape sides with a rubber spatula, and let mix until all ingredients are incorporated.

Assembly:

Pair cakes together so that they are all fitted with a cake that is the same size. On one cake, pipe a quarter-sized amount of filling, then sandwich with the top piece, and enjoy!

Standard
Cookies, Recipes, Vegan

[Vegan] Hibiscus Macadamia Tea Biscuits

Another experiment in vegan baking! Last night I made some hibiscus and mac tea biscuits, and the results were surprisingly better than what I expected.

Image

First off, I was definitely not expecting them to turn this creamy violet color, but I’m not complaining!

Image

The hibiscus gave it a very fruity, almost tart taste and the macadamia gave it a nice crunch in each bite. The recipe is also ridiculously easy and fast.

Hibiscus Macadamia Tea Biscuits

Makes 1 dozen (2″) cookies

*all measurements are by weight except for salt and baking powder

1 oz dried hibiscus flowers

4 oz almond milk

2 oz macadamia nuts, chopped finely

3 oz sugar

5 oz All Purpose flour

1 oz oil

1/4 teaspoon baking powder

1/4 teaspoon salt

In a small saucepan, combine almond milk and dried hibiscus, bring to a simmer over low heat, then let flowers steep until milk is a deep reddish violet color and mixture is completely cool. Strain liquid through a fine mesh sieve, making sure to squeeze out any extra liquid from flowers. Discard flowers and set milk mixture aside.

In a medium mixing bowl with a paddle attachment, mix together chopped macadamia, flour, baking powder, salt, and sugar. Add oil, mix until combined. Add milk/hibiscus mixture, let mix until dough is crumbly.

On a lightly floured surface, remove dough from bowl and bring crumbles together, forming it into a ball. Roll dough to 1/4″ thick, and cut into 2″ cookies. Place 1″ apart on a lined baking sheet and bake at 350F for 7-8 minutes, or until biscuits are dry and firm. Let cool completely and store in an airtight container.

Standard